 SubtitleRocket
How to add subtitles
How to Add Subtitles to a Video: 5 Beginner-Friendly Steps
Learn how to add subtitles to a video with auto-transcription, text and timing fixes, readable styling, and a captioned MP4 export.
The easiest way to add subtitles to a video is to generate them from the speech, correct the words and timing, then burn the finished captions into the picture. SubtitleRocket handles that workflow in a desktop browser, from upload to captioned MP4. You can open the built-in demo first and check the controls and result without creating an account.
This guide creates burned-in subtitles, which stay visible everywhere the video is posted. If viewers need to turn captions on or off, use a separate SRT or VTT file instead. SubtitleRocket includes SRT and VTT downloads with Pro and Max.
00 / Choose a method
Three ways to add subtitles to a video
The right method depends on where the video will be published and how much control you need:
- Burn captions into the video. Best for TikTok, Instagram Reels, YouTube Shorts, and any post where the words should always be visible and keep the same design.
- Upload a subtitle file. SRT and VTT stay separate from the video and let viewers switch captions on or off on platforms such as YouTube.
- Use a platform’s automatic captions. This is quick, but recognition, placement, and styling depend on the platform. Check whether you can correct mistakes before publishing.
01 / Load the video
Upload a video, or start with the demo
Open the SubtitleRocket editor and choose an MP4, MOV, or WebM file. Click Try demo if you only want to learn the controls. The demo opens a ready-made captioned clip without generating or uploading anything. With your own file, the video stays in the browser and only the extracted audio is sent for transcription.
02 / Generate and fix
Generate subtitles, then fix the text and timing
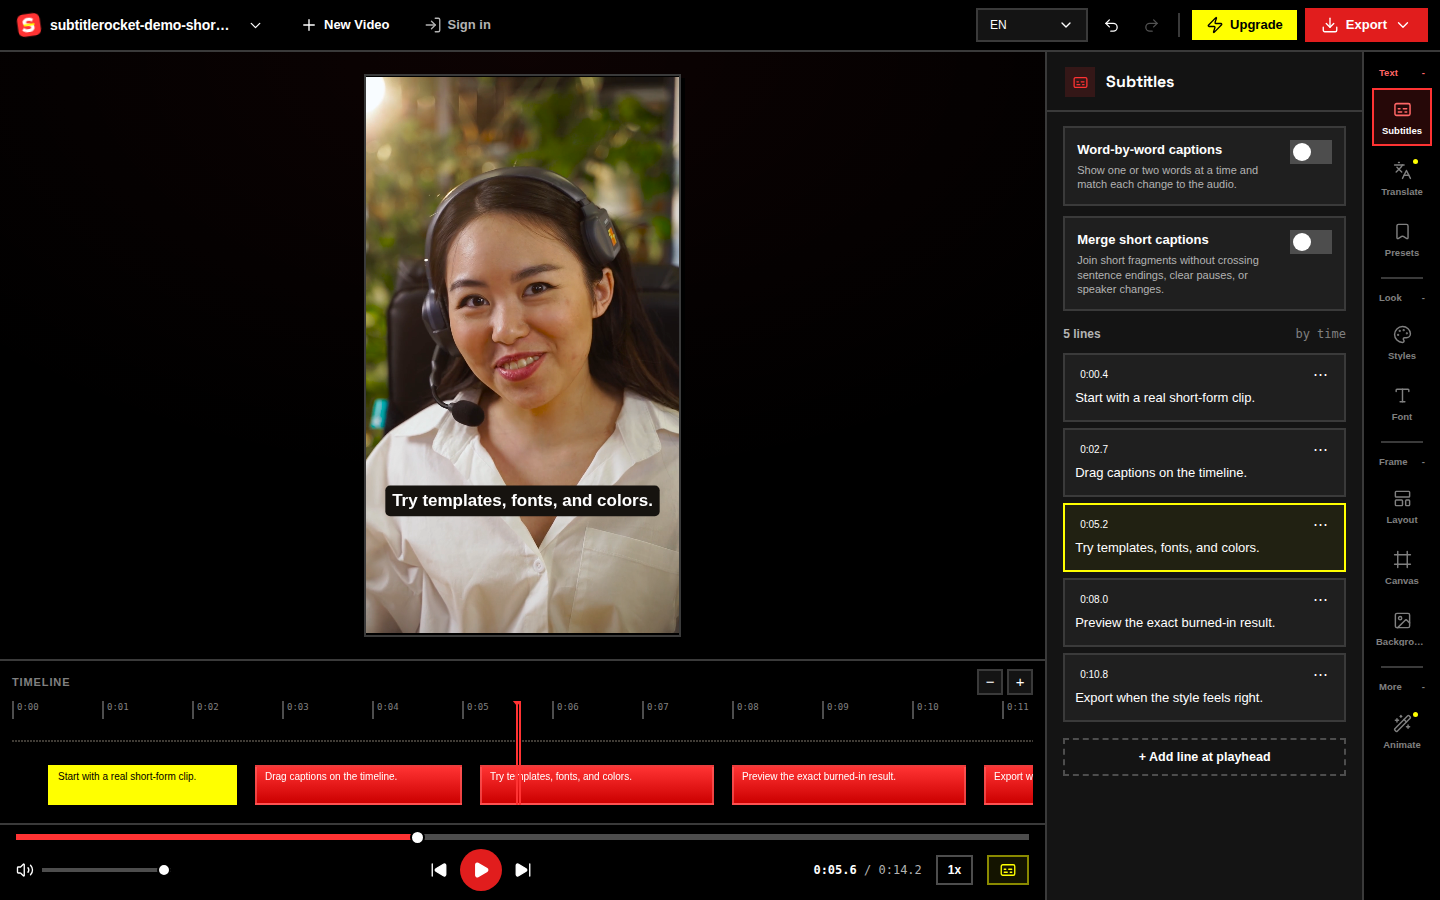
SubtitleRocket turns the speech into captions with a timestamp for every word. Open Subtitles and play from the beginning. Correct names, product terms, numbers, punctuation, and anything the speech recognition misheard. For a silent video, you can add caption lines manually at the playhead.
Long sentences are hard to read while watching the picture. Split them at natural speech pauses, then replay each transition to catch captions that appear late, disappear early, or stay on screen after the speaker has moved on.
03 / Make it readable
Style the subtitles for a phone screen
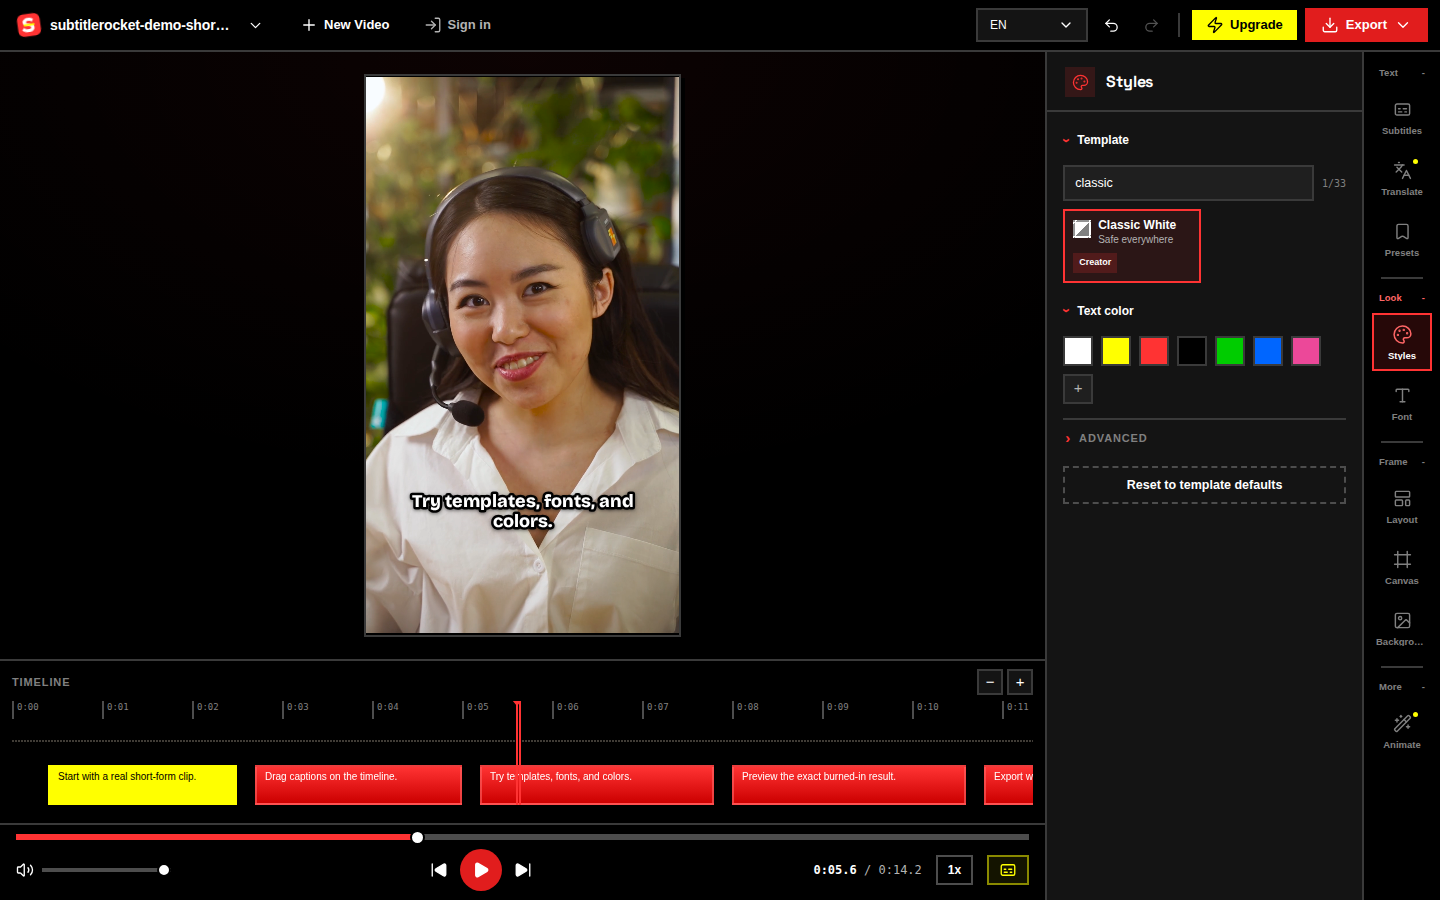
Open Styles to choose a template, then use Font and Layout to adjust size, outline, and position. Transcribed captions can also use Word-by-word captions to show one or two words at a time in sync with the voice. Check both bright and dark scenes; add a dark outline or caption box if the text disappears into the footage.
04 / Check everything
Preview the entire captioned video
Watch once with sound and once muted. The preview should answer four practical questions:
- Can every caption be read on a phone without pausing?
- Do captions begin and end in time with the voice?
- Does the text avoid faces, products, and the controls used by Shorts, Reels, and TikTok?
- Does the story still make sense when you watch with the sound muted?
Shorten the caption before shrinking the type. A few words shown in sequence are easier to follow than a complete sentence squeezed onto one screen.
05 / Export
Export a captioned MP4
Open Export when the preview looks right. Rendering happens on your device, so keep the tab open until it finishes. Free can export clips up to 15 minutes as a 720p MP4 with a small watermark.
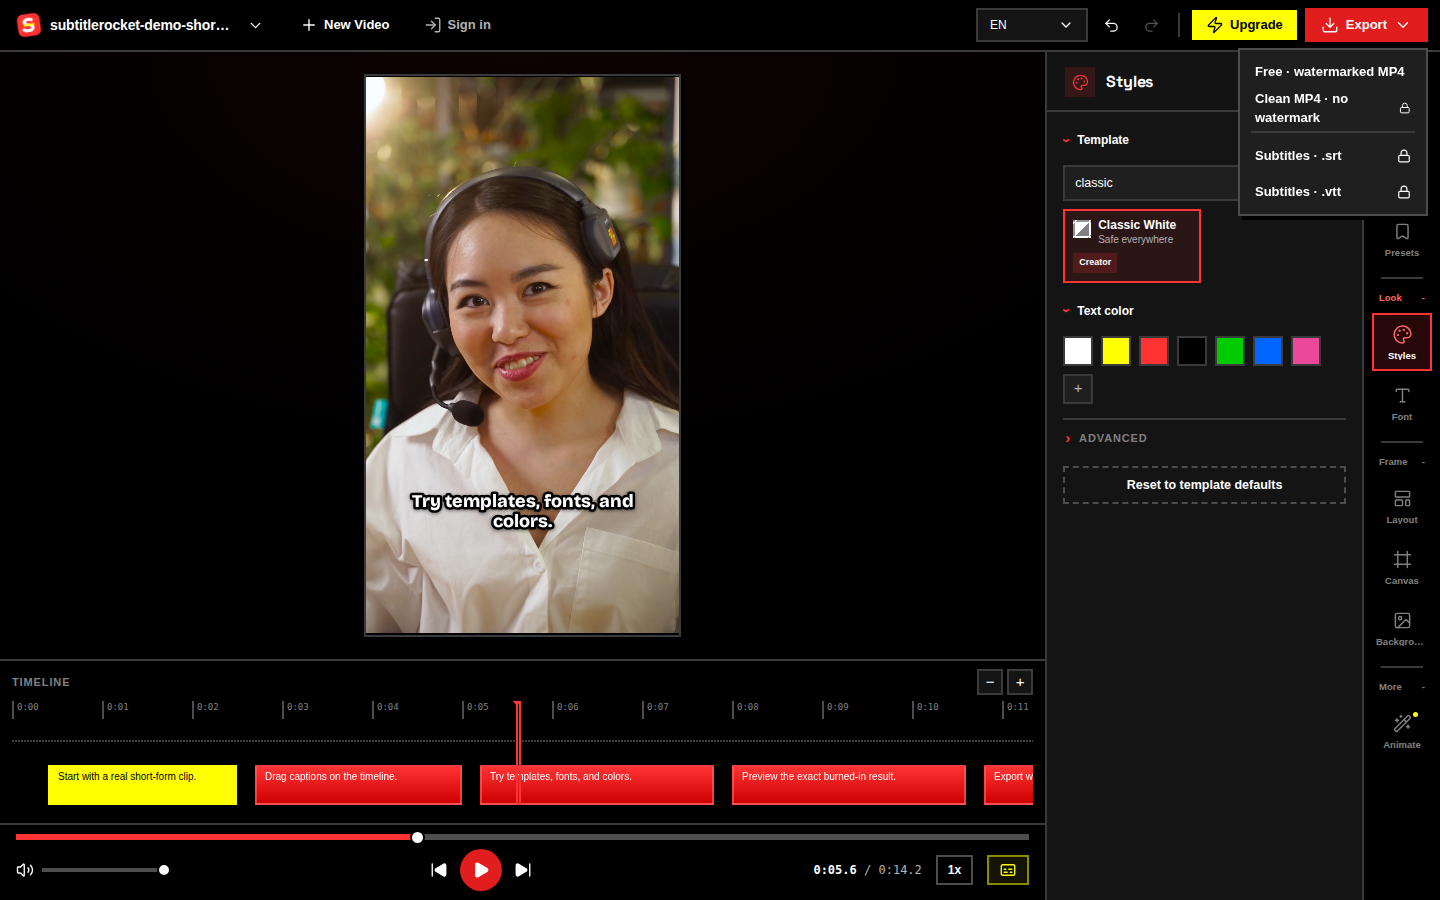
Pro and Max unlock a clean 1080p MP4. If you need switchable captions instead of words burned into the picture, choose SRT or VTT from the same export menu.
Add subtitles in your browser
Try the whole subtitle workflow with the free demo.
Open the captioned sample without signing up. Once the controls make sense, load your own video and take it through generation, correction, styling, and export.
Open the editor